Bulk role assignment by category
This guide explains how to prepare and upload a CSV file using Moodle’s Upload users tool to perform bulk role assignment at category level using the special columns:
category{roleid}categoryrole{roleid}
In this example, a custom role with AI course creation permissions (createcourseai) is used. However, this same process can be applied to any role required by other plugins in the Datacurso AI suite.
Prerequisites
Before preparing the CSV file, make sure:
- Each course category has a defined Category ID number (
idnumber). - You know the
roleidof the role you want to assign. - The role is already created in Moodle.
Configure the Category ID number
Each category must have an ID number configured. This value is used in the CSV file.
-
Go to:
Site administration > Courses > Manage courses and categories
-
In the category action menu, click Edit.
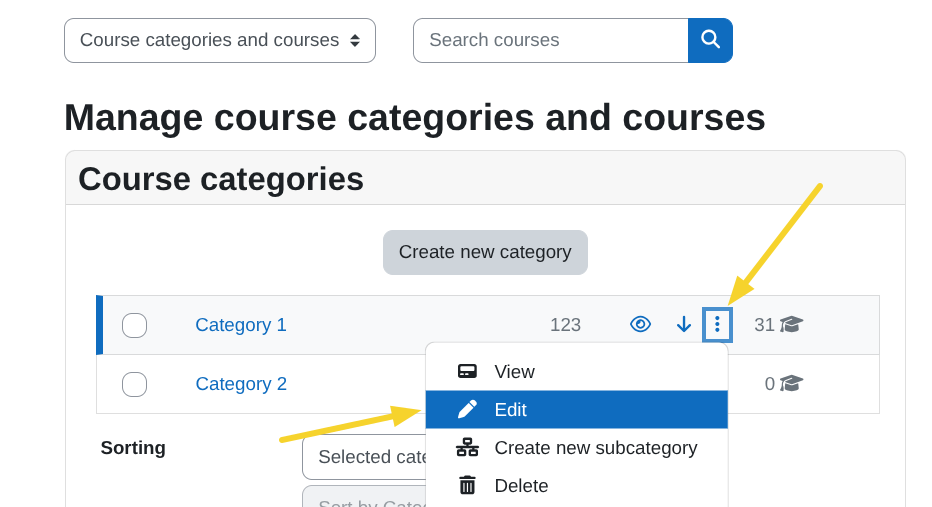
-
In the Category ID number field, enter a value (for example:
123) and save changes.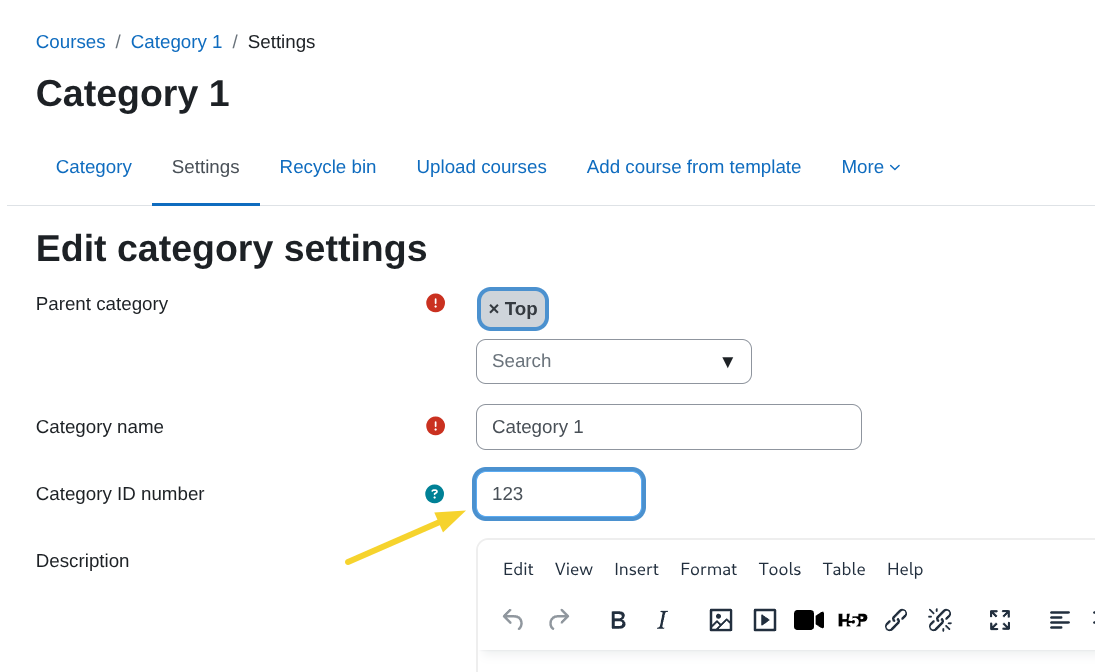
Obtain the role ID (roleid)
You need the internal roleid to build the correct CSV column names.
-
Go to:
Site administration > Users > Permissions > Define roles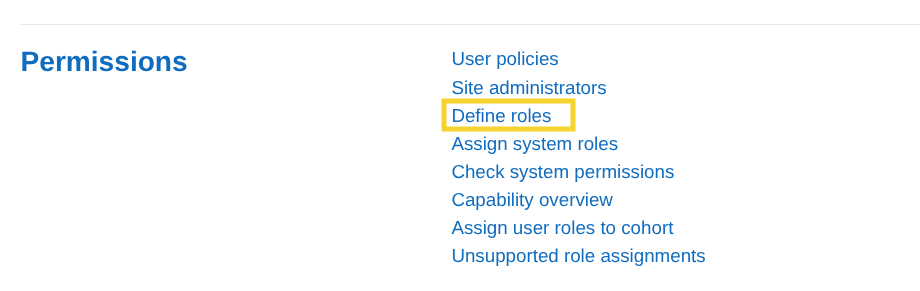
-
Open the role you want to assign (for example,
createcourseai).
-
In the browser URL, locate the parameter:
roleid=XXExample:
roleid=11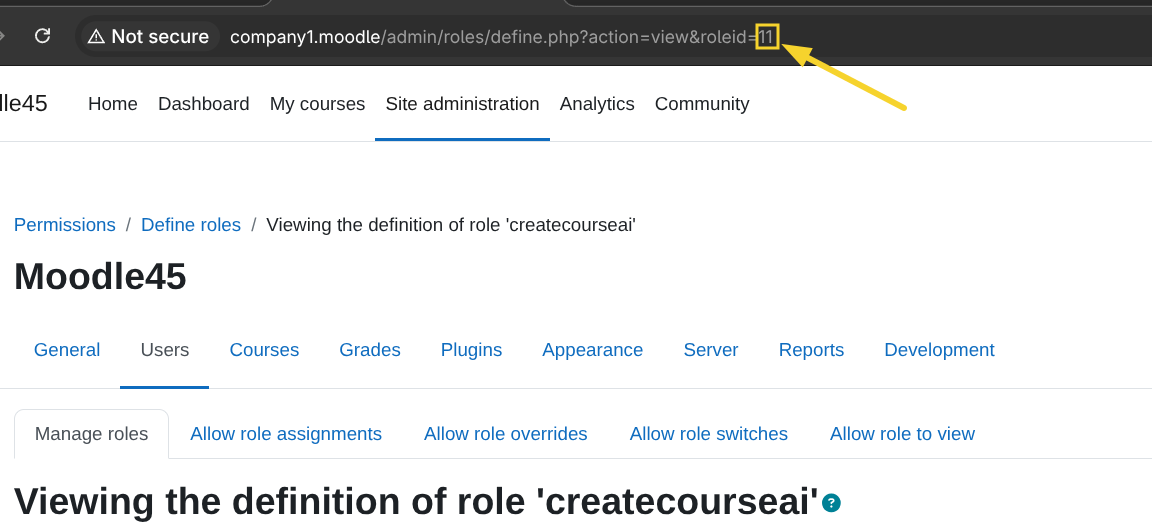
The numeric value is the roleid.
CSV structure
Your CSV file must contain one of the following to identify the user:
usernameemail
Columns required for category role assignment
Replace {roleid} with the numeric role ID.
-
category{roleid}
The Category ID number (idnumber) configured in the category. -
categoryrole{roleid}
The role shortname (for example:createcourseai).
Example (if roleid = 11):
| category11 | categoryrole11 | |
|---|---|---|
| [email protected] | 123 | createcourseai |
| [email protected] | 1234 | createcourseai |
You can download a sample CSV file here.
In this example:
123is the categoryidnumber1234is another categoryidnumbercreatecourseaiis the role shortname
This example uses a custom role with AI course creation permissions. The same structure applies if you need to assign roles required by other Datacurso AI plugins.
Assigning multiple roles in the same CSV file
The CSV file can assign more than one role at category level in a single upload.
To do this, you must repeat the same structure of columns for each additional role, using the corresponding roleid.
For each role, you must include:
category{roleid}categoryrole{roleid}
Each pair of columns works independently.
Example: Assigning two different roles
Assume:
- Role
createcourseai→roleid = 11 - Role
createactivityai→roleid = 12 - Category ID number (
idnumber) =123
Your CSV would look like this:
| category11 | categoryrole11 | category12 | categoryrole12 | |
|---|---|---|---|---|
| [email protected] | 123 | createcourseai | 123 | createactivityai |
| [email protected] | 123 | createcourseai | 123 | createactivityai |
You can download this multi-role sample CSV here.
In this example:
category11andcategoryrole11assign the rolecreatecourseaicategory12andcategoryrole12assign the rolecreateactivityai- Both roles are assigned at the same category (
idnumber = 123)
You can repeat this structure for as many roles as needed, always:
- Obtaining the correct
roleid - Using the exact role shortname
- Ensuring the category
idnumberis correct
This allows you to assign multiple roles to the same user (or different roles to different users) in a single CSV upload.
Upload users to assign roles
To upload the CSV file and assign the roles:
-
Go to:
Site administration > Users > Accounts > Upload users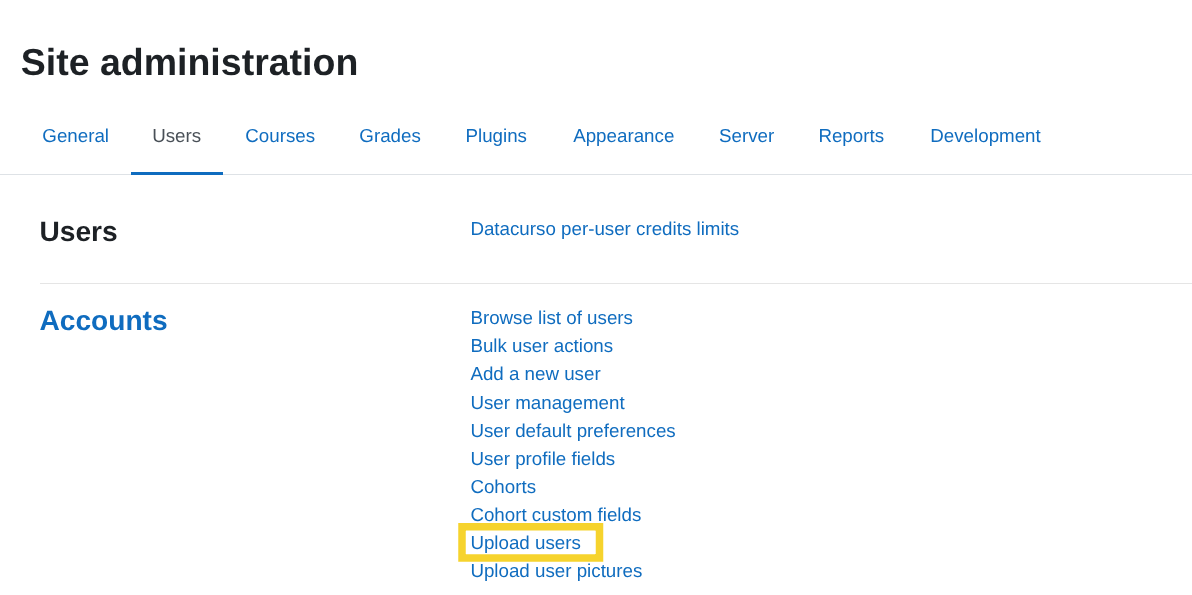
-
In the Upload users page:
- Select your CSV file.
- Make sure the CSV separator is set to
, - Encoding should remain as default (usually UTF-8).
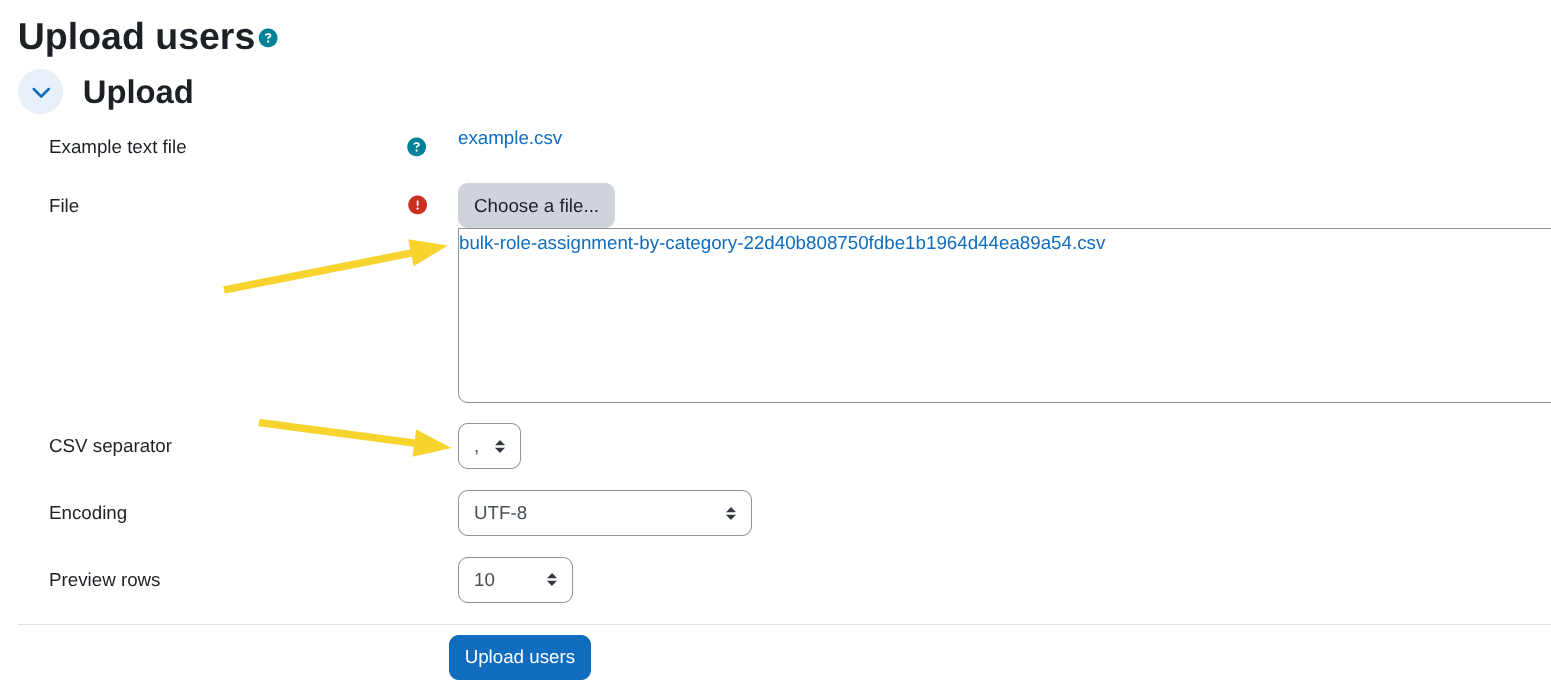
-
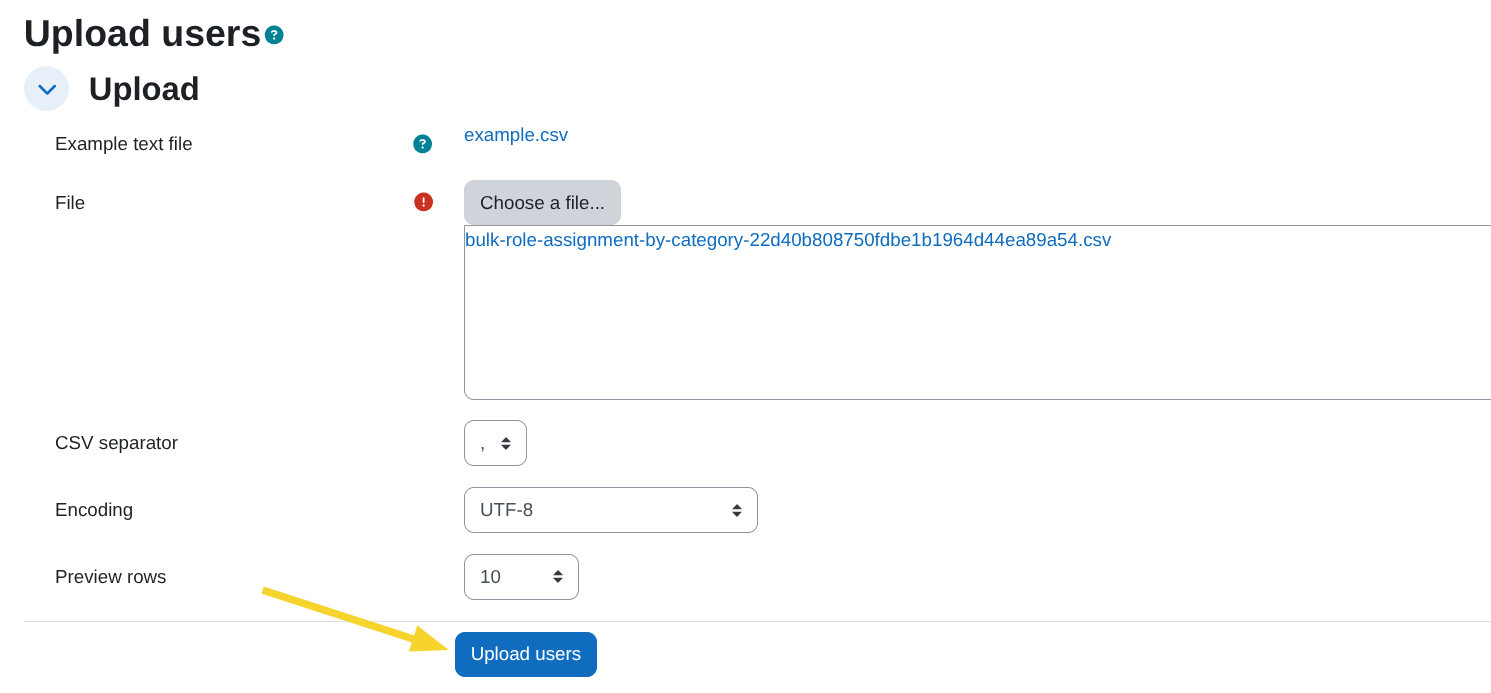
Click Upload users.
Configure upload settings (Preview screen)
After uploading the file, Moodle will display the Upload users preview screen.
You must verify that the following settings are configured exactly as shown:
-
Upload type:
Update existing users only -
Existing user details:
No changes -
Match on email address:
Yes -
Leave the rest of the options with their default values unless your organisation requires otherwise.
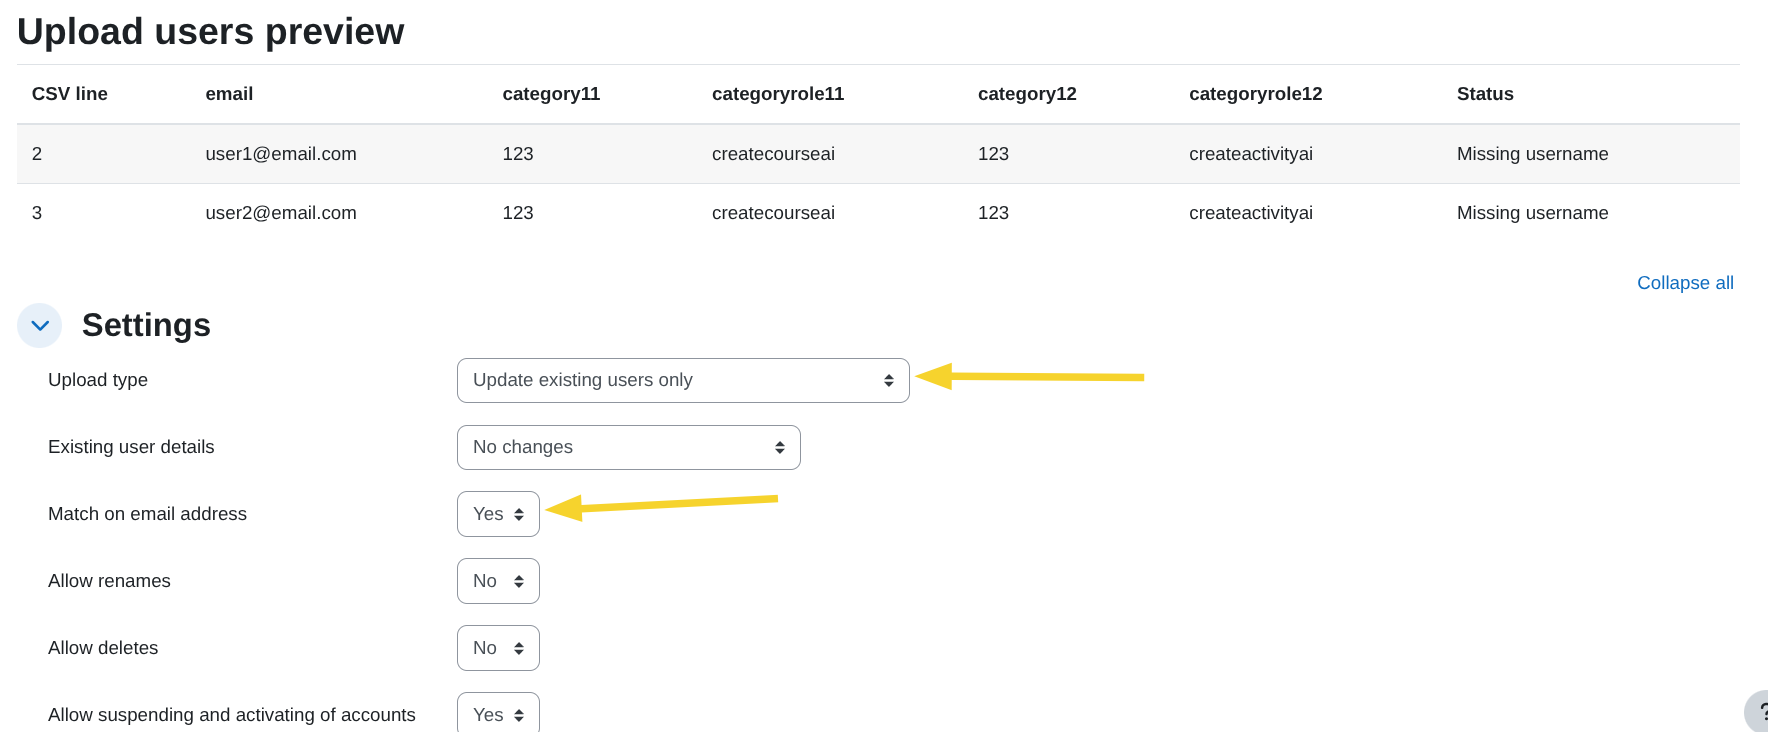
Then scroll to the bottom and click Upload users.

Upload users results
After clicking Upload users, Moodle will display a results screen similar to the following:
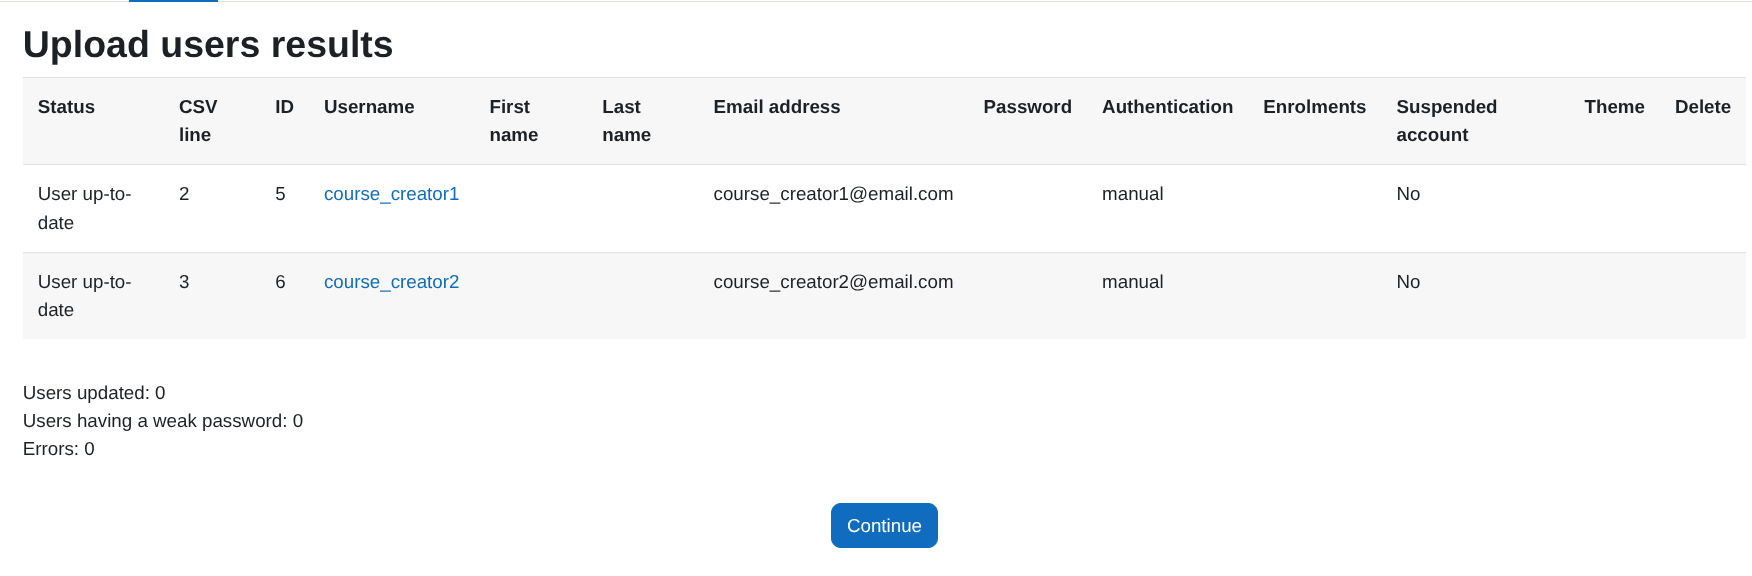
This page shows:
- The users processed from the CSV file
- Their status (updated or assigned)
- Any potential errors
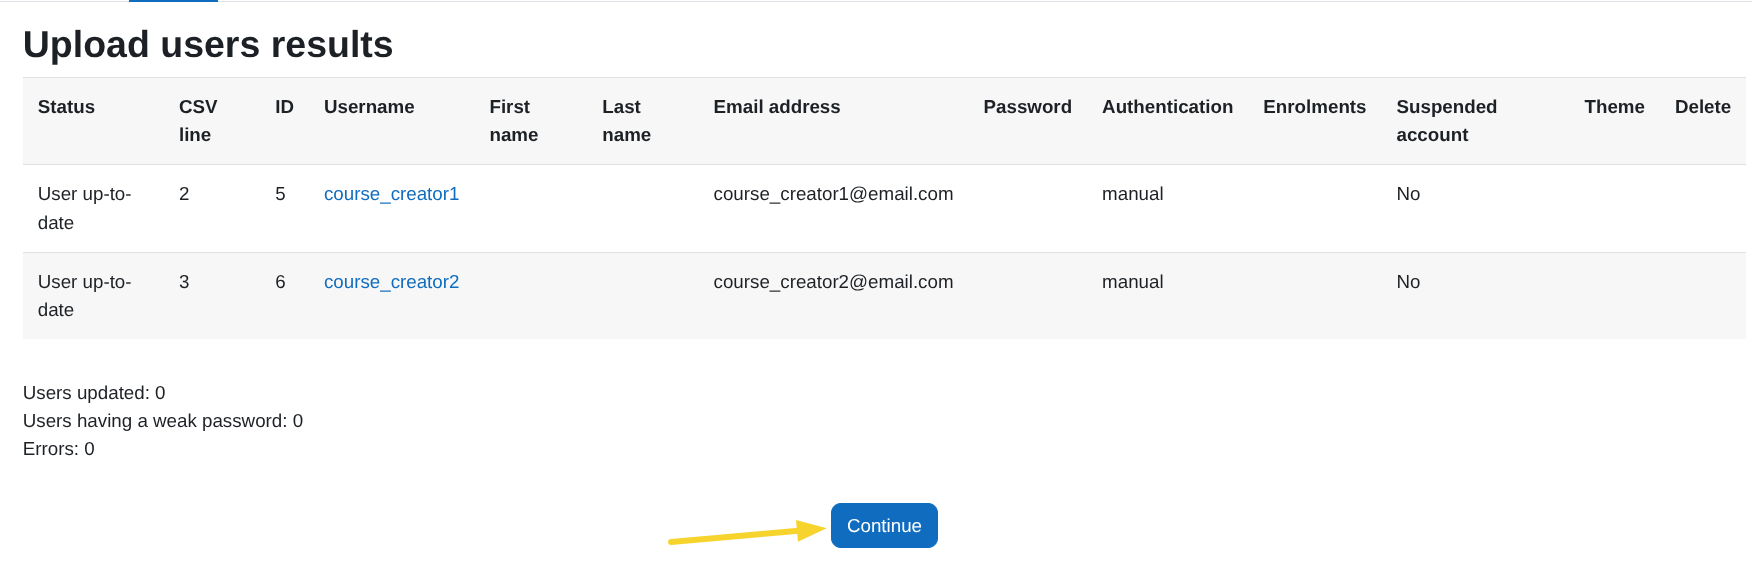
If everything is correct, click Continue to complete the process.
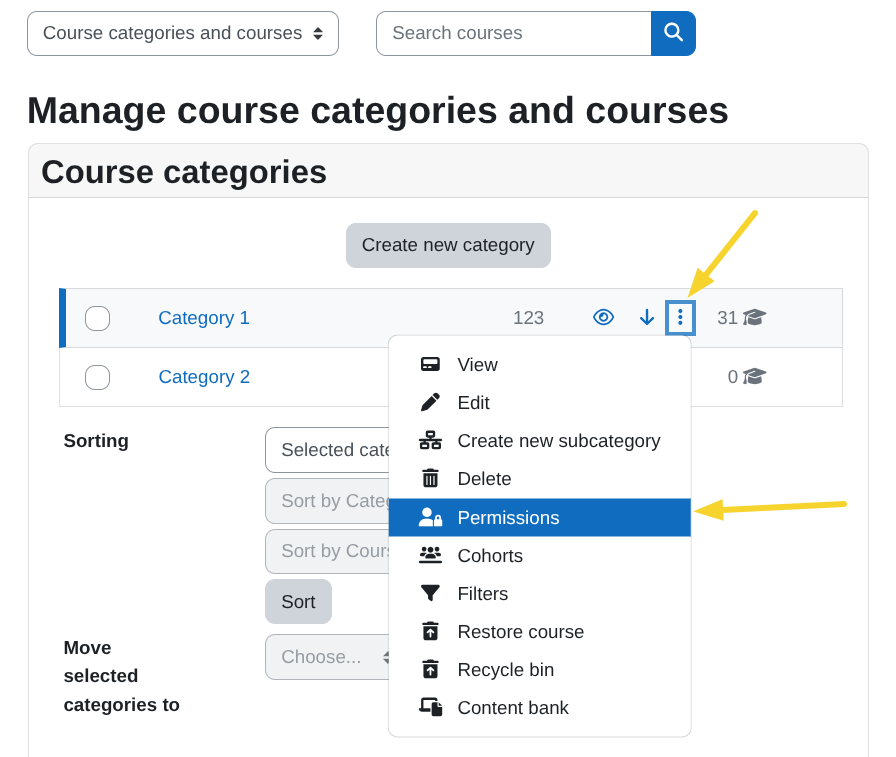
Verify the role assignment by category
To confirm that the users were correctly assigned to the role in each category:
-
Go to:
Site administration > Courses > Manage courses and categories -
In the category where the role was assigned, open the action menu and click Permissions.
By default, the view opens in the Permissions tab.
-
Change the dropdown from Permissions to Assign roles.
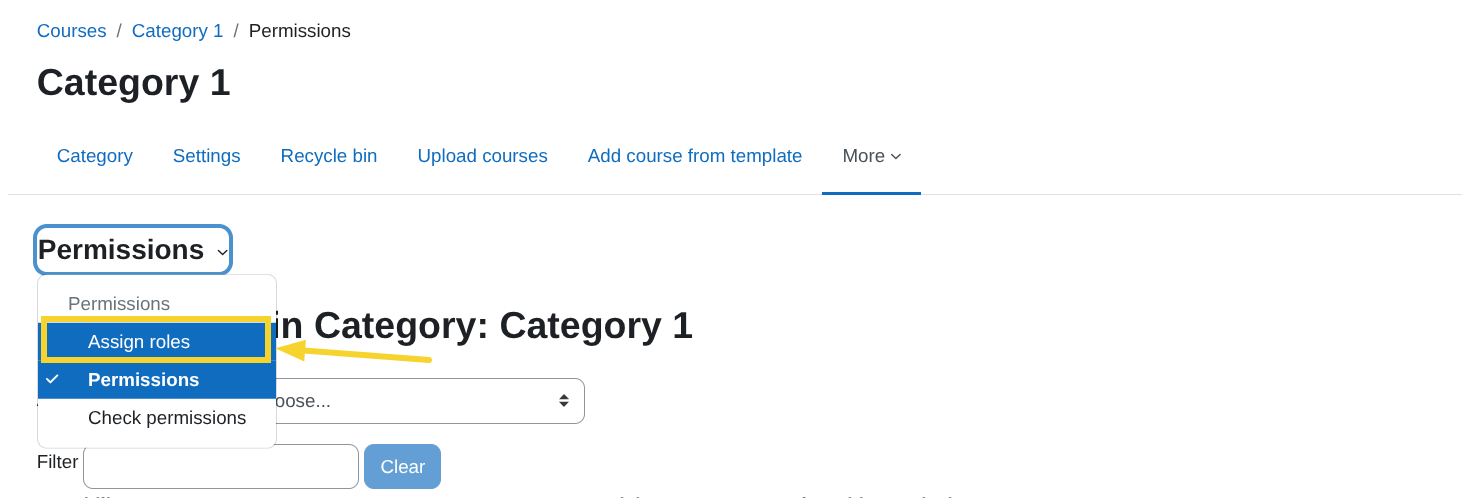
Confirm assigned users
You will now see the list of available roles in that category and the users assigned to each role.
For example:
- In Category 1, the user
[email protected]is assigned to the rolecreatecourseai. - In Category 2, the same user is also assigned to the role
createcourseai.

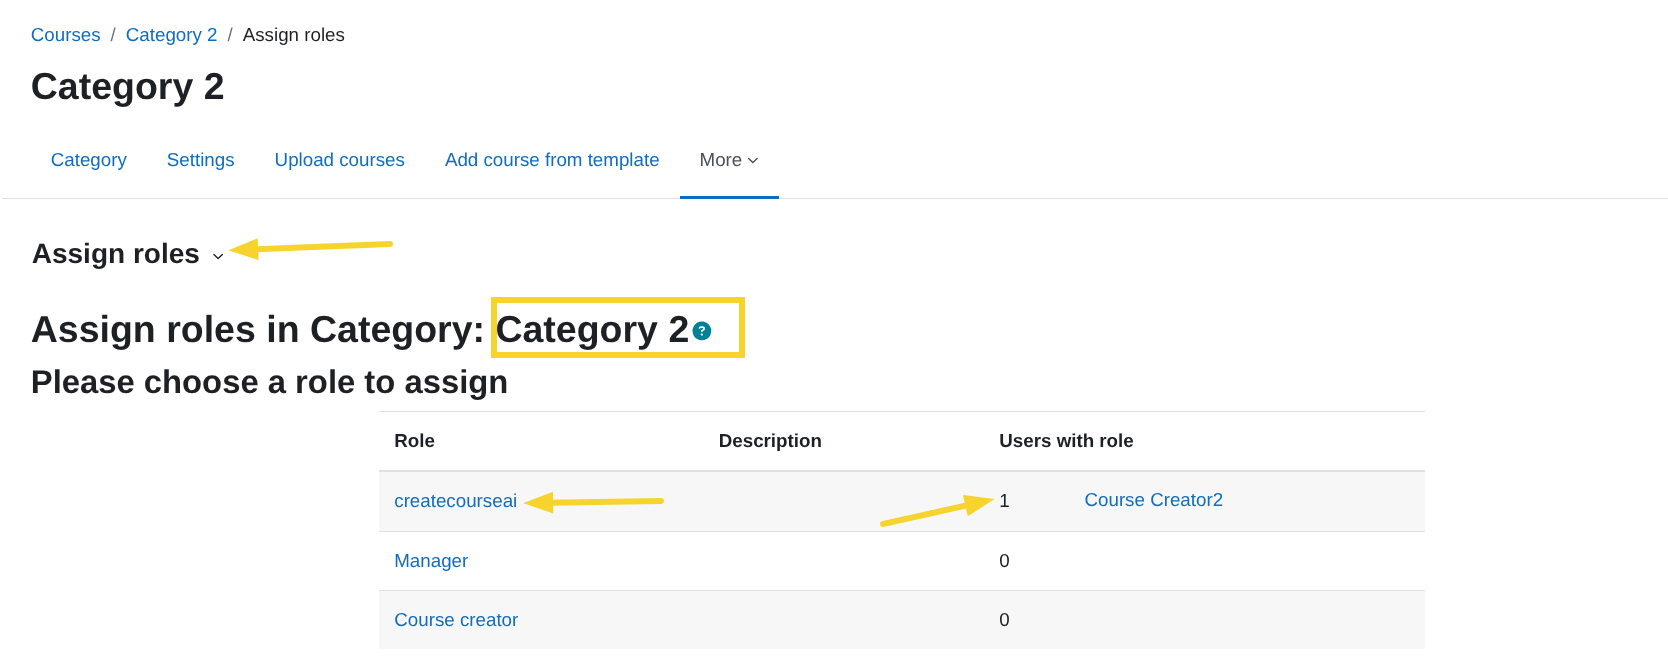
This confirms that the bulk CSV role assignment was successful.
Important considerations
- If the user does not appear under the expected role, verify:
- The
category{roleid}value matches the correct category ID number. - The
categoryrole{roleid}value matches the exact role shortname.
- The
- If the category ID number is incorrect, the assignment will not apply to the intended category.
- This verification process works for any role assigned at category level, not only AI-related roles.
This completes the bulk role assignment process by category.