Create a course with AI
Follow these steps to create a new course using the Datacurso AI workflow:
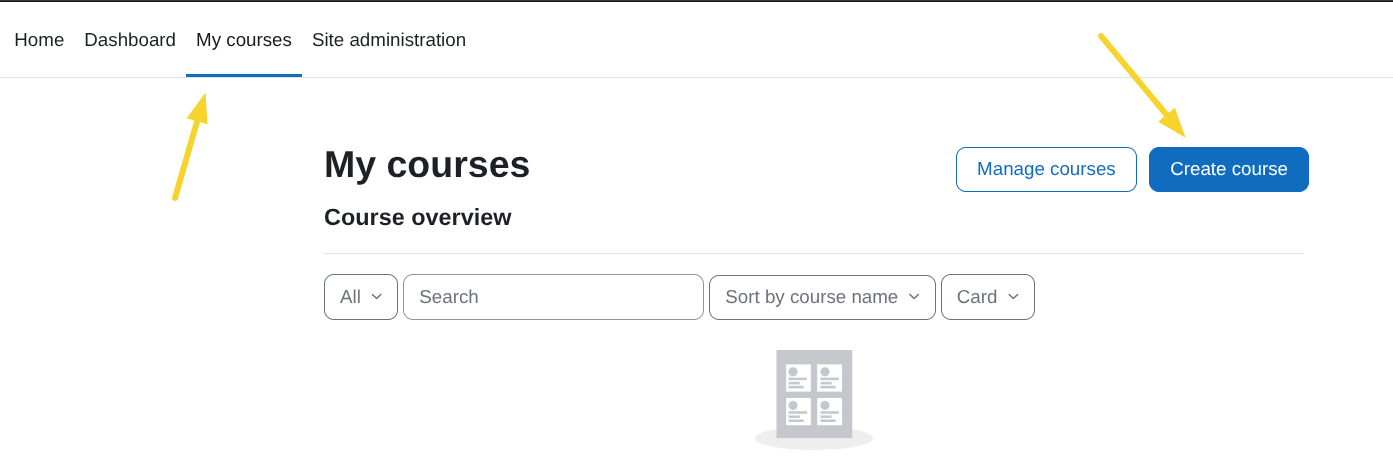
Open the course creation page
-
Path A:
Site administration > Courses > Manage courses and categoriesand click the Create new course button.
-
Path B: From your My courses area, click the Create course button.
Fill in basic course details
-
Complete standard fields like
Course full name,Course short name,Course category,Course format, and any other required fields.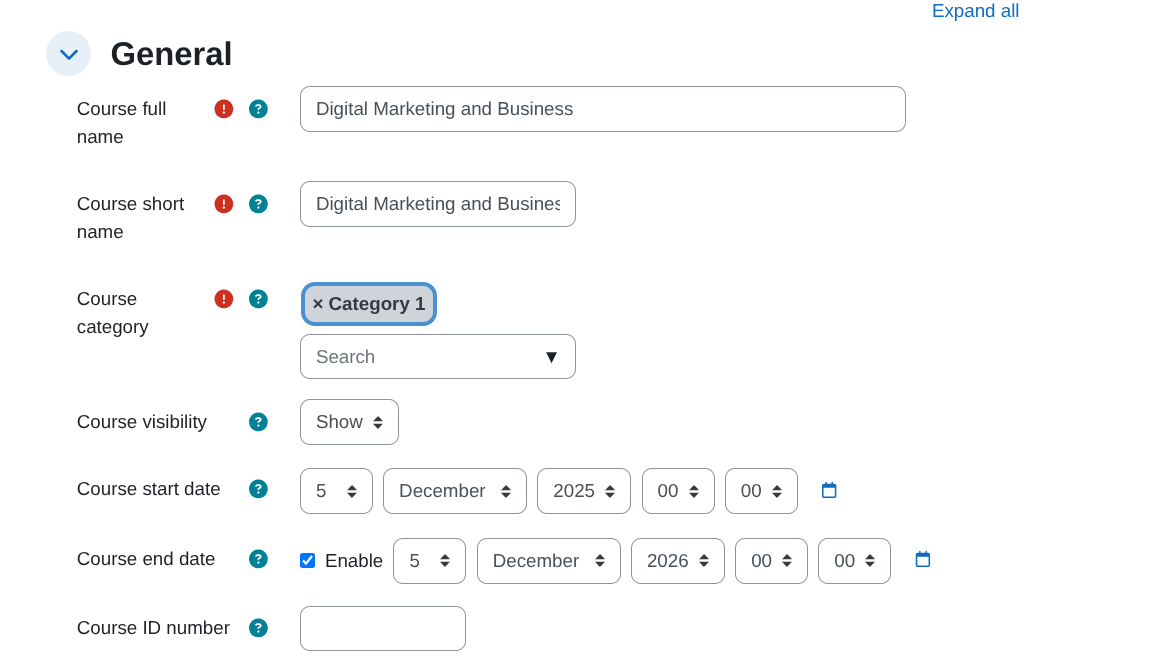
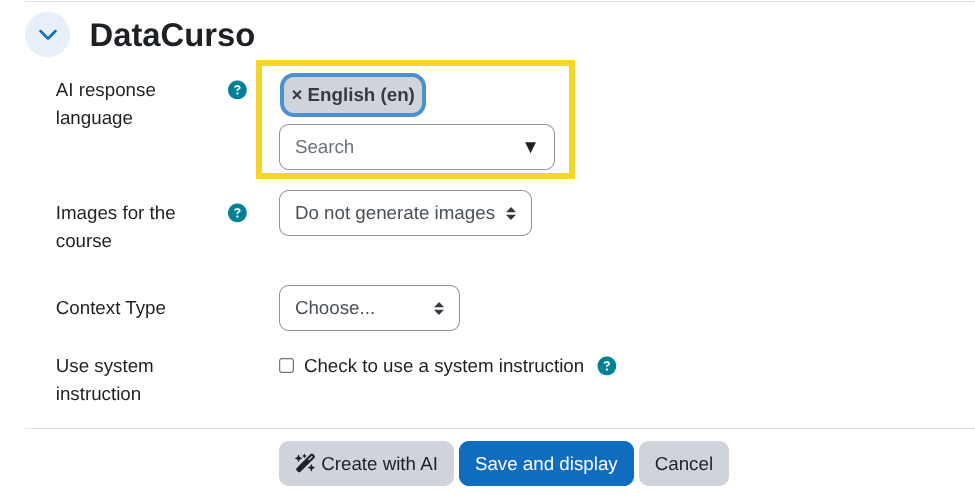
Configure the Datacurso section
The Datacurso section lets you define the context that the AI will use to understand the course you want to create, the language in which it should respond, and whether it should generate images. It is divided into five main configuration areas:
-
1. AI response language
- Use the AI response language selector to choose the language in which the AI will respond and generate the course content.
- This value is saved per course and reused across AI interactions (planning, adjusting the plan, and course creation).
-
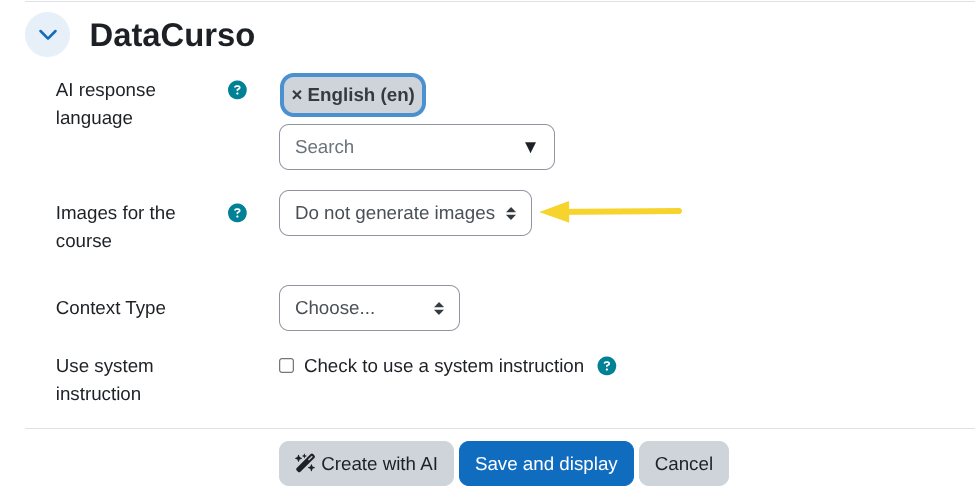
2. Images for the course
- Use the Images for the course selector to decide whether the AI should generate images for sections, activities and other visual elements of the course.
- By default this is set to Do not generate images.
- Important: Enabling image generation may drastically increase the number of credits consumed in your Datacurso AI Provider license key, because each generated image uses additional credits.
-
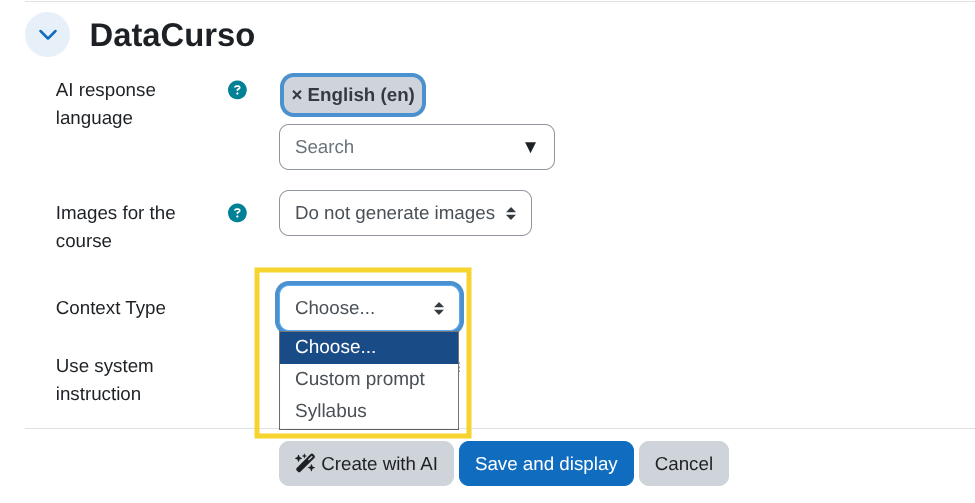
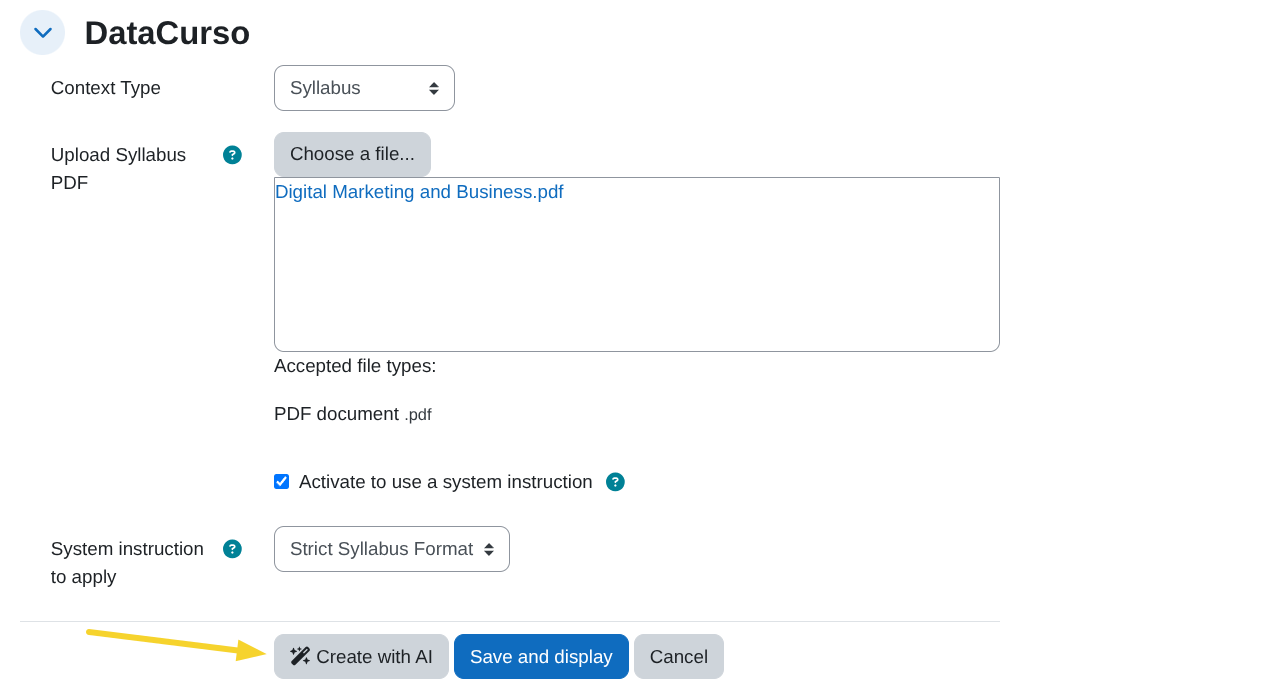
3. Context type
-
Use the Context Type selector to choose how you will provide the main context for the course:
- Custom prompt: You describe the course context manually.
- Upload Syllabus (PDF): You provide an existing syllabus document.
-
-
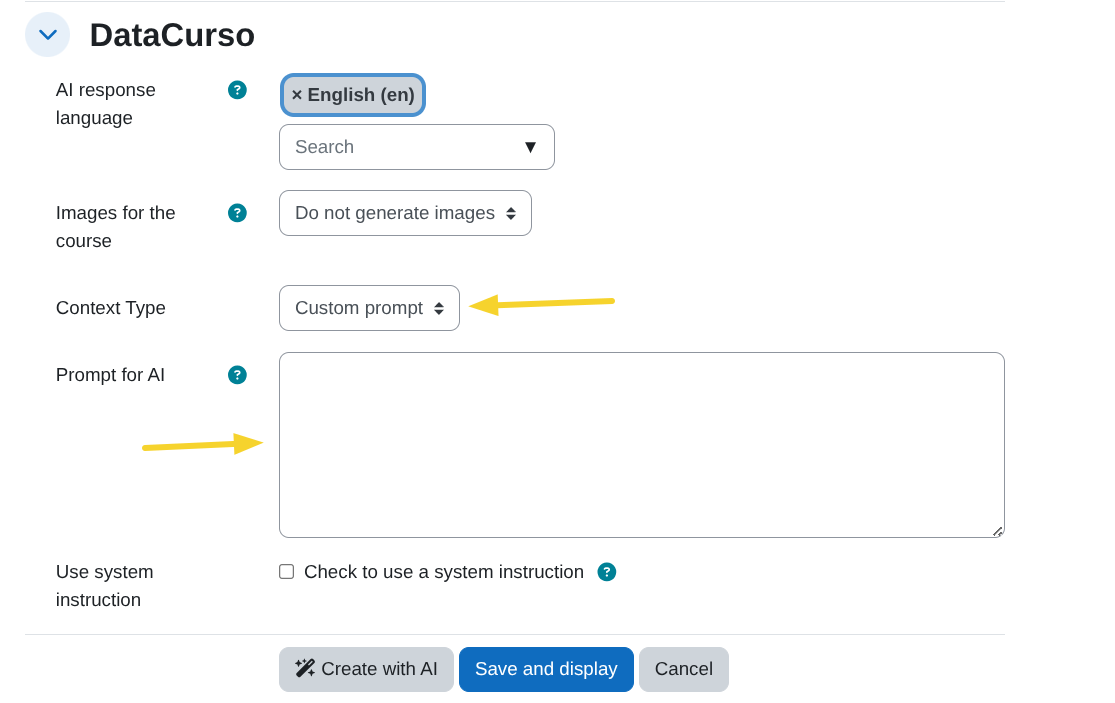
4. Context details
-
If you choose Custom prompt
- A textarea labeled Prompt for AI appears.
- Enter a clear and detailed prompt that describes how you want the course to be generated (objectives, student profile, content, level, constraints, examples, etc.).
-
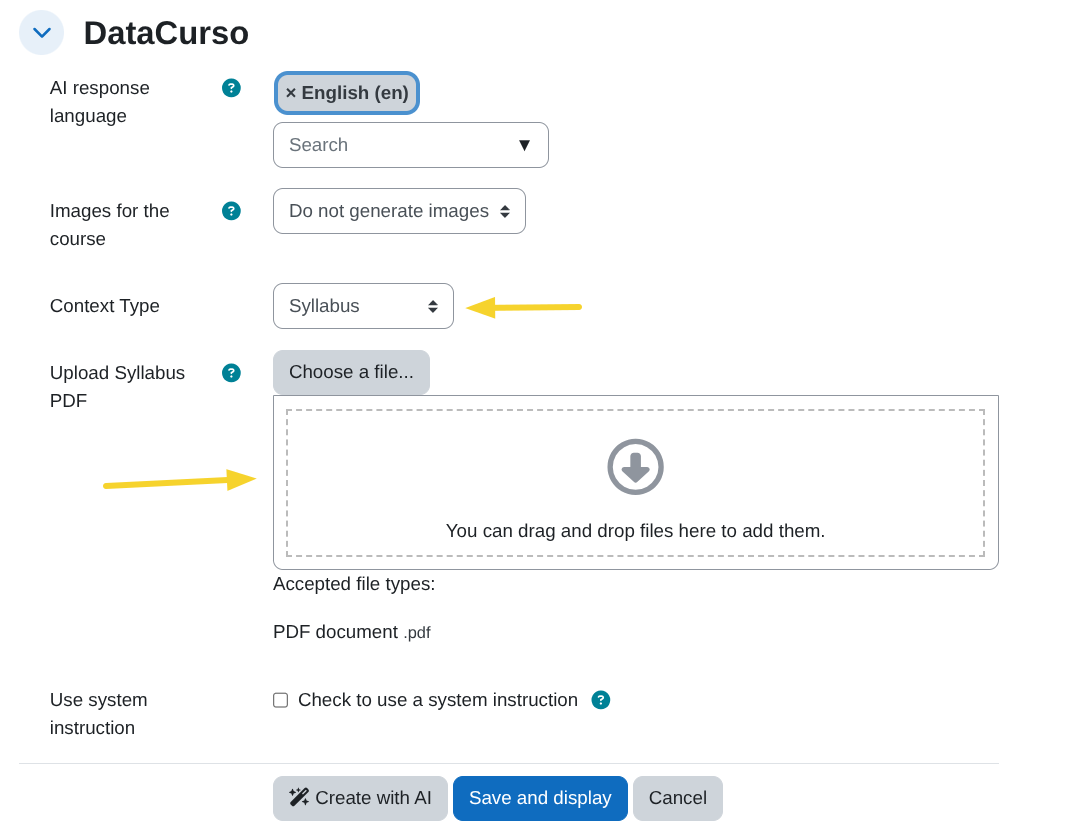
If you choose Upload Syllabus (PDF)
- A file picker labeled Upload Syllabus PDF appears.
- Upload a PDF with the course syllabus. It will be sent to the AI for context analysis.
-
-
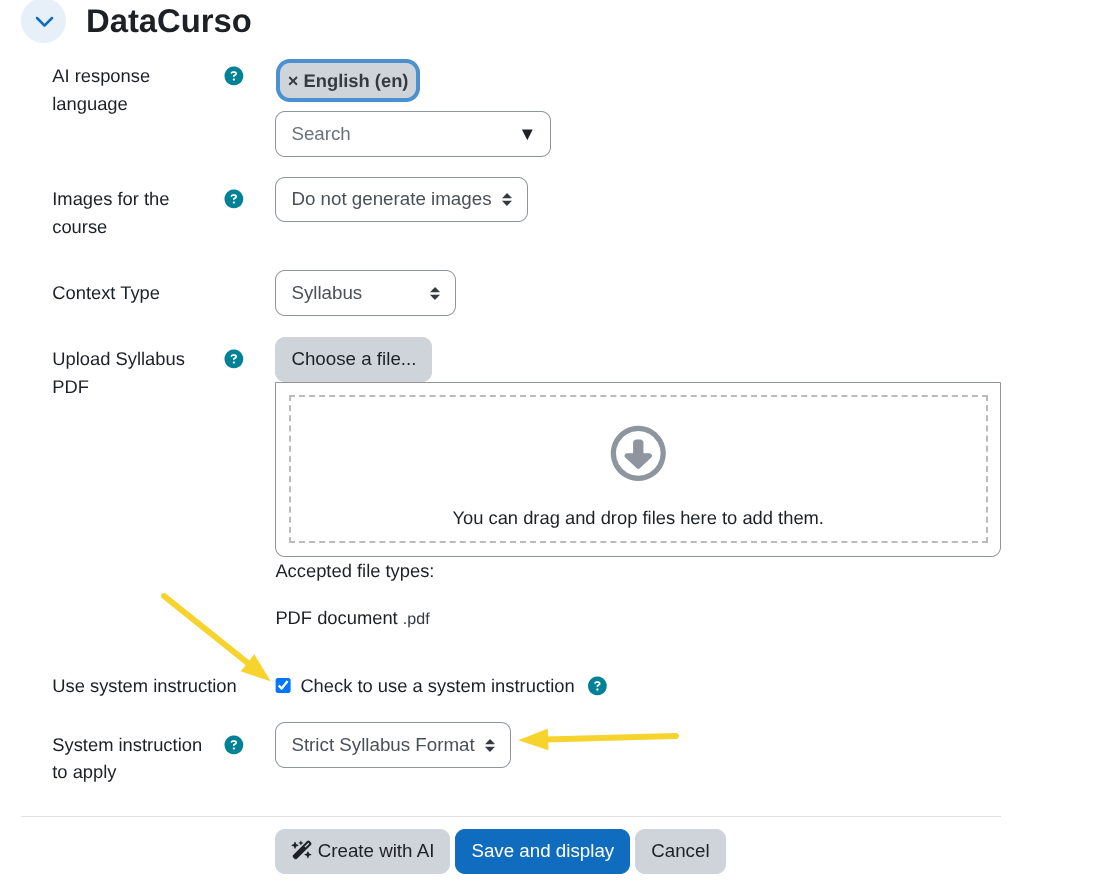
5. Optional system instructions (for any context type)
- You can reinforce either context type (
Custom promptorSyllabus) with a reusable system instruction. - Tick the checkbox Check to use a system instruction to enable this feature.
- If there are system instructions configured (see Manage system instructions):
- A selector labeled System instruction to apply appears with the available options.
- The selected system instruction will be applied together with the chosen context (prompt or syllabus) when generating the course.
- If there are no system instructions configured:
- A notice is shown with a link to the Manage system instructions page so you can create them.
- You can reinforce either context type (
Plan with AI
-
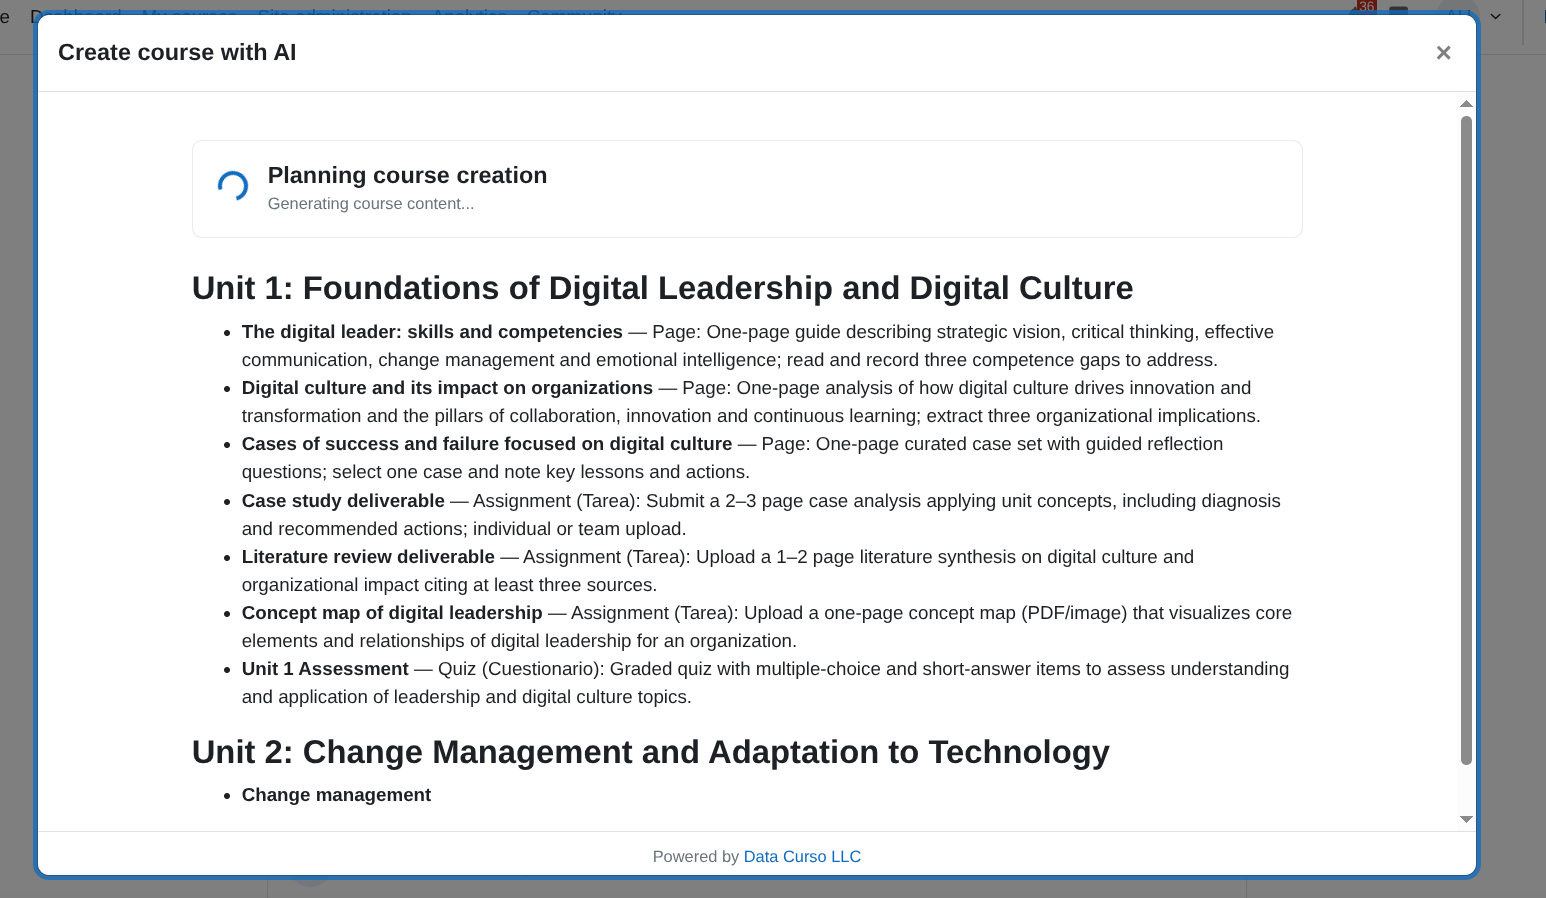
Click Create with AI to start the AI planning process.
-
A modal window will open and display the planning progress.
-
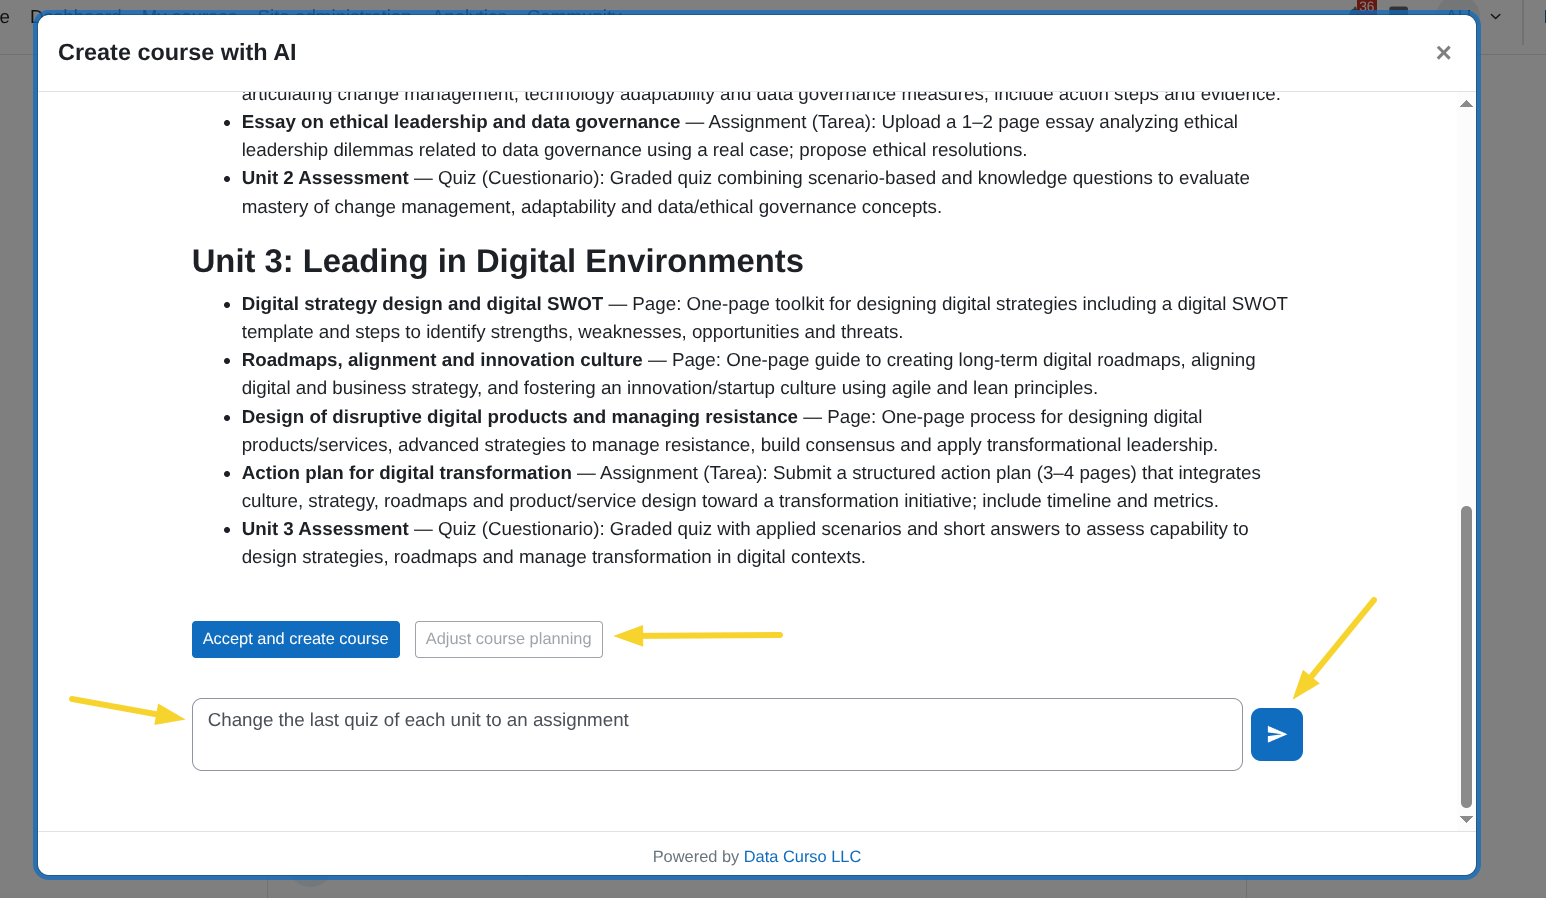
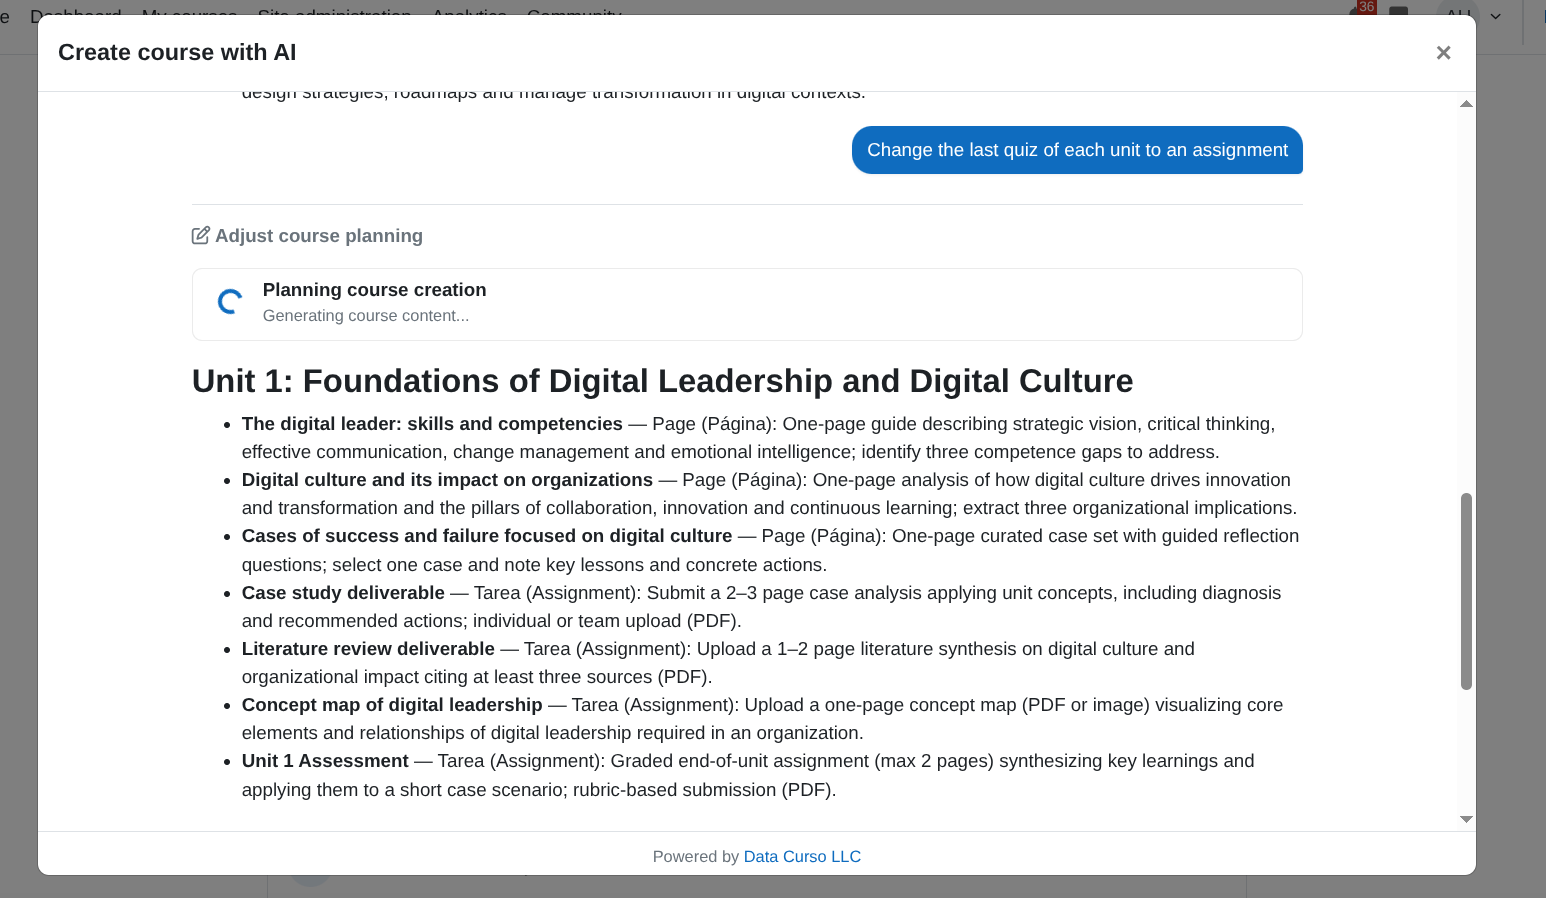
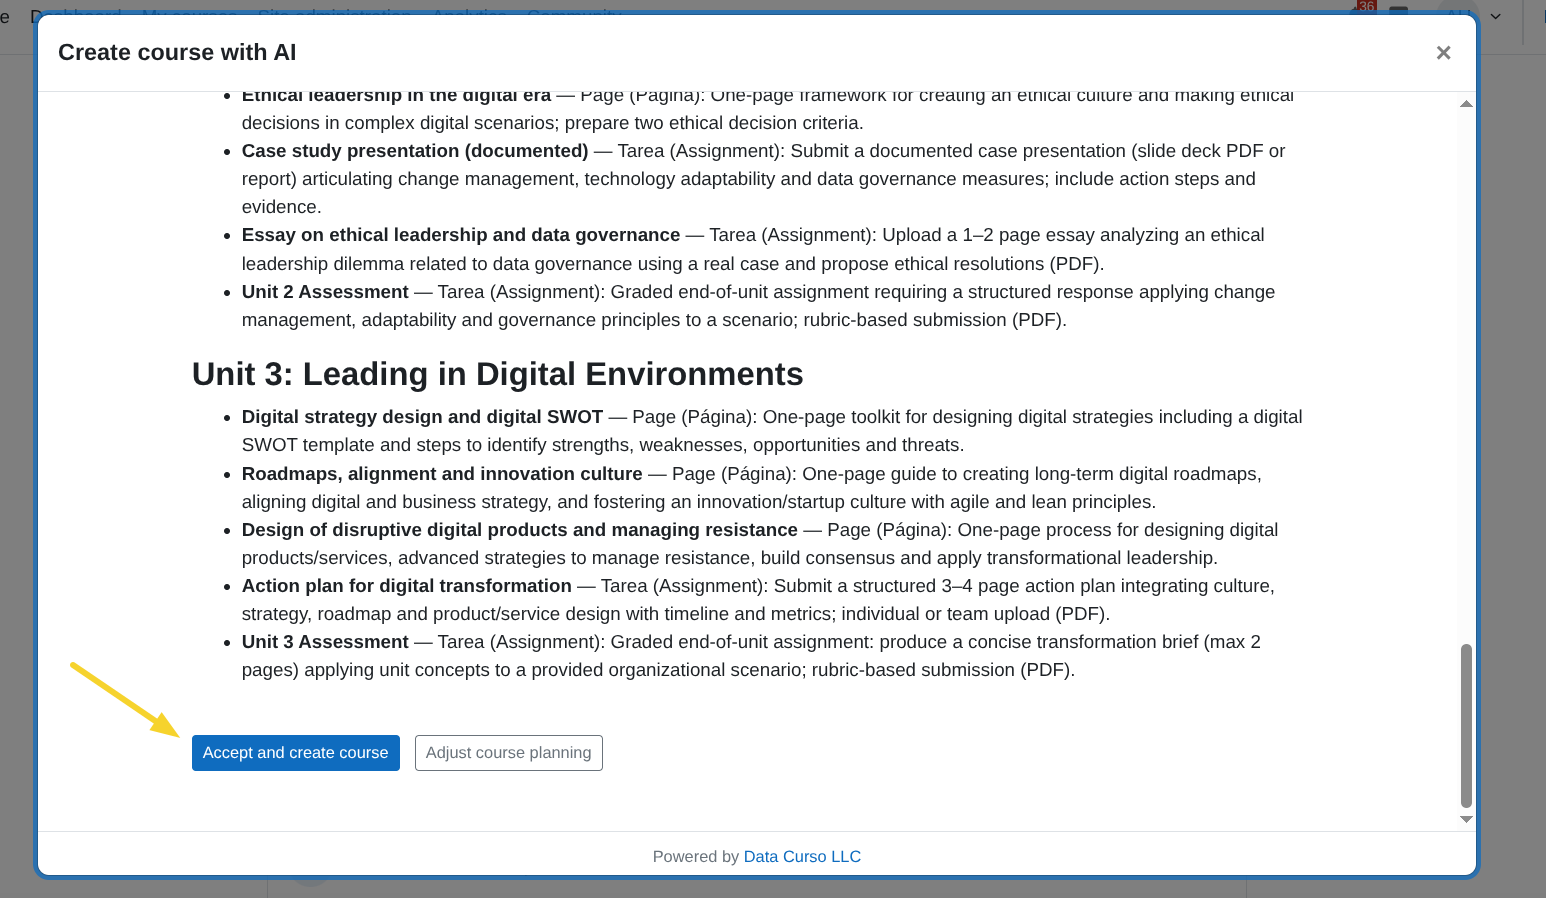
Once the plan is generated, you can optionally adjust it by clicking Adjust course planning, then provide a prompt with your instructions to re-plan.
-
The progress of the plan adjustment will be displayed in the modal window.
Create the course
-
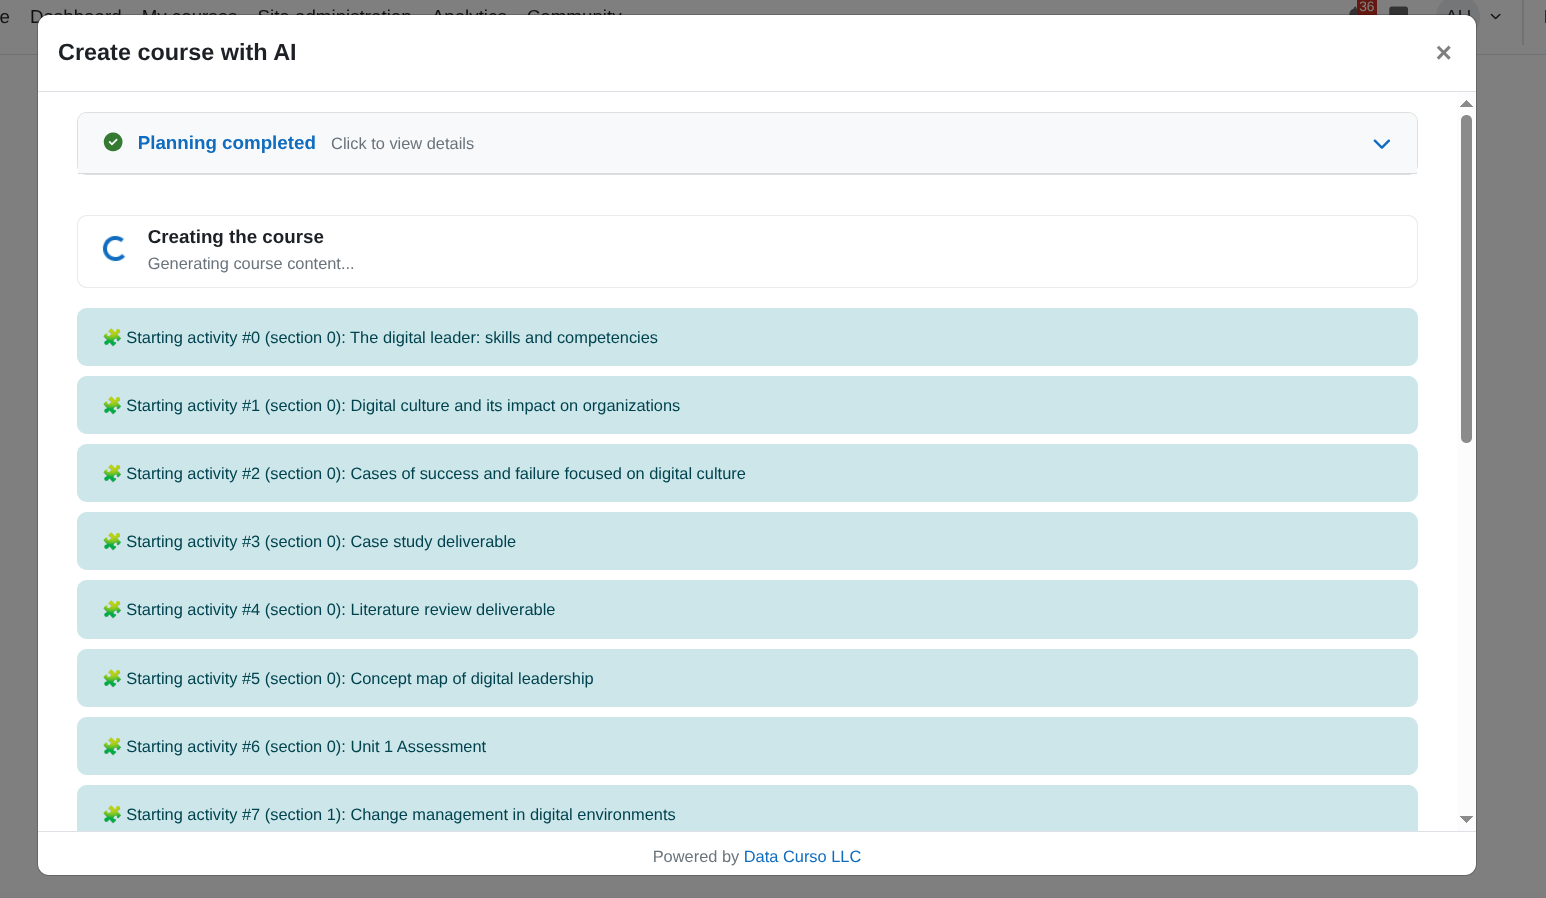
When the planning looks good, click Accept and create course.
-
This starts creating the course with planned content.
-
The modal will show real-time updates for each phase of the process.
-
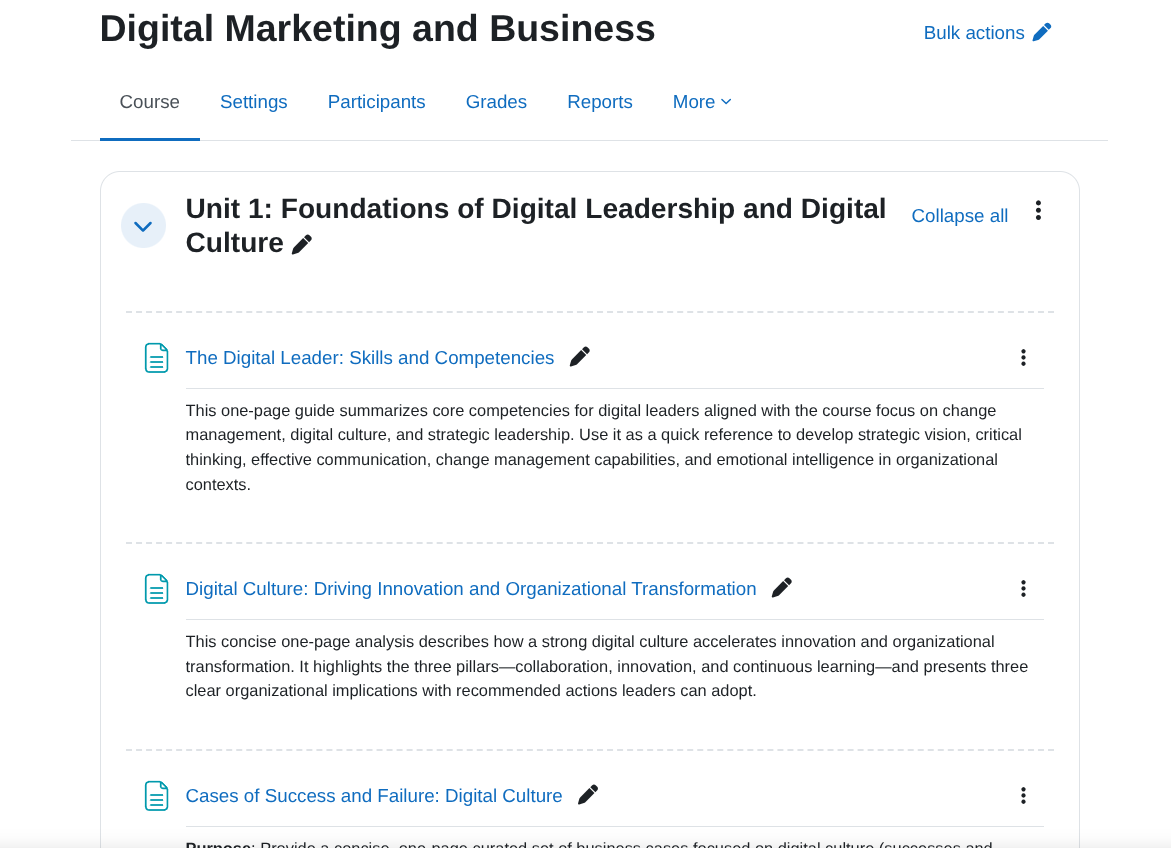
Once the process is completed, it redirects to the created course.
Do not close the modal window during the planning or creation process to avoid issues with course creation.